빠른 시작
이 가이드는 qiskit-paulice 패키지의 최소한의 작동 예제를 보여 줍니다. 시공간 Pauli 검사를 사용해 Clifford 회로를 실행하는 동안 발생한 오류를 감지하고, 오류가 감지되지 않은 샘플만 사후 선택합니다. 충실도 향상을 정량화하는 더 자세한 엔드투엔드 워크플로는 심화 튜토리얼을 참고하세요.
워크플로 단계
- 입력을 준비합니다: Clifford 페이로드 회로, 검사를 수행할 타깃/보조 큐비트, 그리고 노이즈 모델.
- 좋은 시공간 Pauli 검사를 찾아 회로에 추가합니다.
- 검사가 추가된 회로를 샘플링합니다.
- 오류가 감지되지 않은 샘플만 사후 선택합니다.
1. 입력 준비하기
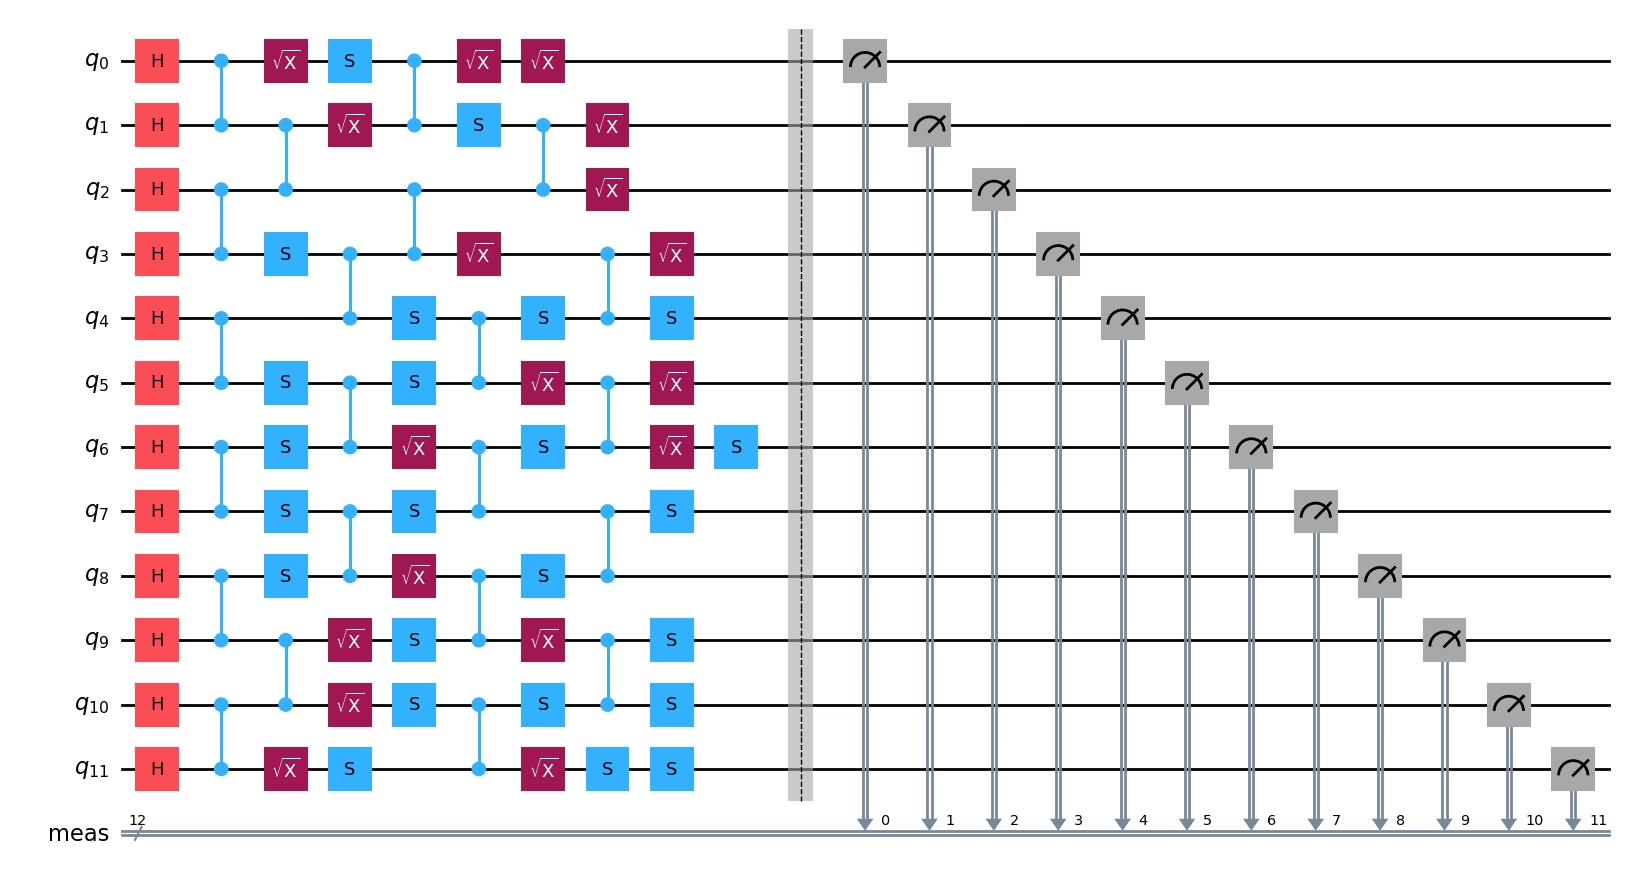
add_pauli_checks는 측정으로 끝나는 Clifford 회로(또는 stabilizers kwarg를 사용하는 경우 측정이 없는 회로, 시공간 코드 가이드 참조), 검사를 구현하는 데 사용할 타깃 큐비트, 그리고 후보 검사를 평가하는 데 사용할 노이즈 모델을 입력으로 받습니다. 여기서는 얕은 무작위 Clifford 회로를 만들고, ibm_boston의 물리 큐비트 1차원 체인에 배치하며, 각 페이로드 큐비트를 이웃한 보조 큐비트와 짝지은 뒤(검사에 SWAP 게이트가 필요하지 않도록), 백엔드 벤치마크 데이터로부터 대략적인 탈분극 노이즈 모델을 추정합니다.
# Added by doQumentation — installs the packages this notebook needs if they are missing
import importlib.util

_needed = {"numpy": "numpy", "qiskit": "qiskit", "qiskit_aer": "qiskit-aer", "qiskit_ibm_runtime": "qiskit-ibm-runtime", "qiskit_paulice": "qiskit-paulice"}
_missing = [pip for module, pip in _needed.items()
            if importlib.util.find_spec(module) is None]
# One at a time, so a package that fails to install does not block the others
for _pip in _missing:
    %pip install -q {_pip}
if not _missing:
    print("\u2713 All required packages are installed")
import numpy as np
from qiskit import QuantumCircuit
from qiskit_ibm_runtime import QiskitRuntimeService
from qiskit_paulice.layout import get_check_qubits
from qiskit_paulice.noise_models import NoiseModel

# Backend and a 1D chain of physical qubits to run on
backend = QiskitRuntimeService().backend("ibm_boston")
layout = [68, 69, 78, 89, 90, 91, 98, 111, 112, 113, 119, 133]

# A shallow brickwork random Clifford payload circuit
rng = np.random.default_rng(1764)
circuit = QuantumCircuit(len(layout))
circuit.h(range(circuit.num_qubits))
for d in range(4):
    for i in range(d % 2, circuit.num_qubits - 1, 2):
        circuit.cz(i, i + 1)
    for q in range(circuit.num_qubits):
        if rng.integers(0, 2):
            circuit.sx(q)
        if rng.integers(0, 2):
            circuit.s(q)
circuit.measure_all()

# Pair each payload qubit with a neighboring ancilla to host a check (no SWAPs needed)
target_qubits, ancilla_qubits = get_check_qubits(backend.coupling_map, layout)

# A rough depolarizing noise model from backend benchmark data, used to score checks
noise_model = NoiseModel.from_backend(
    backend, layout, uniform_gate_noise=True
)

circuit.draw("mpl", fold=-1)
2. 시공간 Pauli 검사 찾아서 추가하기
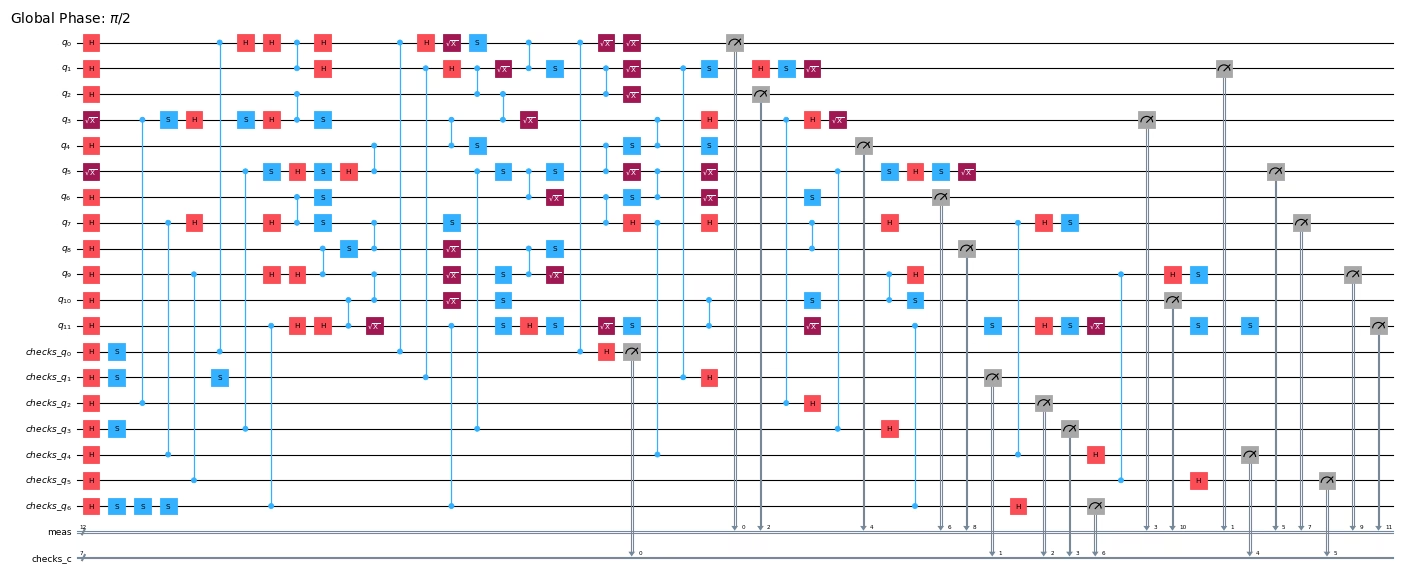
add_pauli_checks는 각 타깃 큐비트에 대해 효과적이고 가중치가 낮은 검사를 찾아 회로에 추가하고, CheckedCircuit 인스턴스의 시퀀스를 반환합니다. CheckedCircuit 인스턴스에는 0개의 검사부터 타깃 큐비트당 검사 하나까지 점점 더 많은 검사가 포함됩니다. 검사가 하나 늘 때마다 오류 감지 능력이 향상되지만 회로 깊이가 약간 증가합니다. 이 예제에서는 모든 타깃 큐비트에 검사가 있는 회로를 사용합니다.
from qiskit_paulice import add_pauli_checks

# The circuit has virtual qubits, so we specify our target qubits with virtual indices
target_qubits_v = [layout.index(q) for q in target_qubits]

# Add spacetime Pauli checks
checked_circuit = add_pauli_checks(circuit, target_qubits_v, noise_model)[-1]
checked_circuit.circuit.draw("mpl", fold=-1, scale=0.4, idle_wires=False)
3. 검사가 추가된 회로 샘플링하기
샘플링하기 전에, 검사가 추가된 회로를 물리 큐비트(initial_layout = layout + ancilla_qubits)와 ibm_boston의 네이티브 기저 게이트 집합으로 트랜spile합니다. 노이즈가 있는 QPU를 모사하기 위해, 검사를 선택할 때 사용한 noise_model과 오류율이 일치하는 노이즈 Aer 스태빌라이저 백엔드로 샘플링합니다.
from qiskit import transpile
from qiskit_aer import AerSimulator
from qiskit_aer.noise import NoiseModel as AerNoiseModel
from qiskit_aer.noise import ReadoutError, depolarizing_error

# Transpile once: lay the checked circuit out on our qubits and into the native basis
isa_circuit = transpile(
    checked_circuit.circuit,
    backend,
    initial_layout=layout + ancilla_qubits,
    optimization_level=0,
)

# Build an Aer noise model matching the depolarizing model used to pick checks
aer_noise = AerNoiseModel()
aer_noise.add_all_qubit_quantum_error(
    depolarizing_error(noise_model.gate_noise, 2), ["cz"]
)
p = noise_model.readout_noise
aer_noise.add_all_qubit_readout_error(ReadoutError([[1 - p, p], [p, 1 - p]]))
simulator = AerSimulator(method="stabilizer", noise_model=aer_noise)

counts = (
    simulator.run(isa_circuit, shots=1000, seed_simulator=1764)
    .result()
    .get_counts()
)
print(f"sampled {sum(counts.values())} shots")
sampled 1000 shots
4. 오류가 감지되지 않은 샘플 사후 선택하기
get_postselection_method는 각 샷을 신드롬 벡터로 매핑하며, 신드롬이 모두 0인 샷, 즉 어떤 검사에서도 오류가 감지되지 않은 샷만 유지합니다 — 플래그가 표시된 샷을 버리면 남은 분포에서 감지된 오류가 제거되어 충실도가 향상되지만 샘플링 속도는 낮아집니다. 충실도의 정량적 비교는 튜토리얼을 참고하세요.
# Keep only the shots in which no check reported an error
ps_fn = checked_circuit.get_postselection_method()
counts_postselected = {
    bs: n for bs, n in counts.items() if not ps_fn(bs).any()
}

kept, total = sum(counts_postselected.values()), sum(counts.values())
print(f"kept {kept} of {total} shots ({kept / total:.0%})")
kept 927 of 1000 shots (93%)