투영 양자 커널을 사용하여 특성 분류 향상하기
사용량 추정: Heron r3 프로세서에서 80분 (참고: 이는 추정치이며, 실제 실행 시간은 다를 수 있습니다.)
학습 목표
이 튜토리얼을 완료하면 다음을 이해할 수 있습니다:
- 투영 양자 커널(PQK)의 작동 방식과 잠재적 양자 우위를 제공할 수 있는 경우.
- 실제 데이터셋을 사용하여 하드웨어에서 PQK를 실행하는 방법.
사전 요구 사항
이 튜토리얼을 시작하기 전에 다음 주제에 익숙할 것을 권장합니다:
- IBM Quantum® Learning의 양자 머신 러닝 과정에서의 양자 커널
배경
이 튜토리얼에서는 논문 Enhanced Prediction of CAR T-Cell Cytotoxicity with Quantum-Kernel Methods [1]를 바탕으로, 실제 생물학적 데이터셋에 Qiskit을 사용하여 투영 양자 커널(PQK)을 실행하는 방법을 소개합니다.
PQK는 양자 머신 러닝(QML)에서 고전 데이터를 양자 특성 공간에 인코딩하고 이를 다시 고전 영역으로 투영하는 방법으로, 양자 컴퓨터를 활용하여 특성 선택을 향상시킵니다. 이 방법은 특성 매핑이라는 과정을 통해 고전 데이터를 양자 상태로 인코딩하여 고차원 힐베르트 공간으로 변환합니다. "투영"이란 특정 관측량을 측정하여 양자 상태에서 고전 정보를 추출함으로써, 서포트 벡터 머신과 같은 고전 커널 기반 알고리즘에 사용할 수 있는 커널 행렬을 구성하는 것을 의미합니다. 이 접근 방식은 양자 시스템의 계산적 이점을 활용하여 특정 작업에서 고전적 방법에 비해 더 나은 성능을 달성할 가능성이 있습니다.
PQK의 주요 구성 요소는 양자 특성 맵의 투영 측정을 통해 얻은 축약 밀도 행렬(RDM)입니다. 특히, 각 큐비트에 대한 단일 큐비트 축약 밀도 행렬(1 RDM)을 계산하는 것이 일반적입니다. 이렇게 측정된 값들은 최종 커널 행렬을 구성하기 위해 지수 커널과 같은 고전 커널 함수의 입력으로 사용됩니다.
PQK는 특히 근시일 양자 하드웨어에서 표준 양자 커널에 비해 잠재적인 이점을 제공합니다. 표준 양자 커널은 일반적으로 전역 상태 중첩 추정에 의존하는데, 이는 큐비트 수가 증가함에 따라 정확하게 측정하기 어려워지며 노이즈에 매우 민감합니다. 반면 PQK는 단일 큐비트 축약 밀도 행렬(1 RDM)과 같은 국소 관측량을 사용하여 샘플링 오버헤드를 낮추고, 하드웨어 노이즈에 대한 견고성을 향상시키며, 확장성을 개선합니다. 고전 커널 함수를 적용하기 전에 양자 상태를 국소 측정 특성으로 투영함으로써, PQK는 유용한 양자 상관관계를 유지하면서도 근시일 장치에 더 실용적으로 활용될 수 있습니다.
요구 사항
이 튜토리얼을 시작하기 전에 다음이 설치되어 있는지 확인하세요:
- 시각화 지원이 포함된 Qiskit SDK v2.0 이상
- Qiskit Runtime v0.40 이상 (
pip install qiskit-ibm-runtime) - Category Encoders 2.8.1 (
pip install category-encoders) - NumPy 2.3.2 (
pip install numpy) - Pandas 2.3.2 (
pip install pandas) - Scikit-learn 1.7.1 (
pip install scikit-learn) - Tqdm 4.67.1 (
pip install tqdm)
설정
# Added by doQumentation — required packages for this notebook
!pip install -q category-encoders numpy pandas qiskit qiskit-ibm-runtime scipy scikit-learn tqdm
import warnings

# Standard libraries
import os
import numpy as np
import pandas as pd

# Machine learning and data processing
import category_encoders as ce
from scipy.linalg import inv, sqrtm
from sklearn.metrics.pairwise import rbf_kernel
from sklearn.model_selection import GridSearchCV, StratifiedKFold
from sklearn.svm import SVC

# Qiskit and Qiskit Runtime
from qiskit import QuantumCircuit
from qiskit.circuit import ParameterVector
from qiskit.circuit.library import UnitaryGate, ZZFeatureMap
from qiskit.quantum_info import SparsePauliOp, random_unitary
from qiskit.transpiler import generate_preset_pass_manager
from qiskit_ibm_runtime import (
    Batch,
    EstimatorOptions,
    EstimatorV2 as Estimator,
    QiskitRuntimeService,
)

# Progress bar
import tqdm

warnings.filterwarnings("ignore")
소규모 시뮬레이터 예제
이 튜토리얼에서는 소규모 시뮬레이터 예제를 생략합니다. 주요 목표가 투영 양자 커널이 더 큰 시스템과 실제 하드웨어로 어떻게 확장될 수 있는지 보여주는 것이기 때문입니다.
대규모 하드웨어 예제
Step 1: 고전 입력을 양자 문제로 매핑하기
데이터셋 준비
이 튜토리얼에서는 이진 분류 작업을 위해 Daniels et al. (2022)이 생성한 실제 생물학적 데이터셋을 사용하며, 해당 논문의 보충 자료에서 다운로드할 수 있습니다. 데이터는 특정 암을 치료하기 위한 면역 치료에 사용되는 유전자 조작 T세포인 CAR T세포로 구성되어 있습니다. T세포는 일종의 면역 세포로, 암세포의 특정 단백질을 표적으로 하는 키메라 항원 수용체(CAR)를 발현하도록 실험실에서 변형됩니다. 이렇게 변형된 T세포는 암세포를 보다 효과적으로 인식하고 파괴할 수 있습니다. 데이터 특성은 CAR T세포에 내장된 CAR의 특정 구조적 또는 기능적 구성 요소를 나타내는 CAR T세포 모티프입니다. 이러한 모티프를 바탕으로, 주어진 CAR T세포의 세포 독성을 독성 또는 비독성으로 예측하는 것이 우리의 목표입니다. 다음은 이 데이터셋을 전처리하는 헬퍼 함수를 보여줍니다.
def preprocess_data(dir_root, args):
    """
    Preprocess the training and test data.
    """
    # Read from the csv files
    train_data = pd.read_csv(
        os.path.join(dir_root, args["file_train_data"]),
        encoding="unicode_escape",
        sep=",",
    )
    test_data = pd.read_csv(
        os.path.join(dir_root, args["file_test_data"]),
        encoding="unicode_escape",
        sep=",",
    )

    # Fix the last motif ID
    train_data[train_data == 17] = 14
    train_data.columns = [
        "Cell Number",
        "motif",
        "motif.1",
        "motif.2",
        "motif.3",
        "motif.4",
        "Nalm 6 Cytotoxicity",
    ]
    test_data[test_data == 17] = 14
    test_data.columns = [
        "Cell Number",
        "motif",
        "motif.1",
        "motif.2",
        "motif.3",
        "motif.4",
        "Nalm 6 Cytotoxicity",
    ]

    # Adjust motif at the third position
    if args["filter_for_spacer_motif_third_position"]:
        train_data = train_data[
            (train_data["motif.2"] == 14) | (train_data["motif.2"] == 0)
        ]
        test_data = test_data[
            (test_data["motif.2"] == 14) | (test_data["motif.2"] == 0)
        ]

    train_data = train_data[
        args["motifs_to_use"] + [args["label_name"], "Cell Number"]
    ]
    test_data = test_data[
        args["motifs_to_use"] + [args["label_name"], "Cell Number"]
    ]

    # Adjust motif at the last position
    if not args["allow_spacer_motif_last_position"]:
        last_motif = args["motifs_to_use"][len(args["motifs_to_use"]) - 1]
        train_data = train_data[
            (train_data[last_motif] != 14) & (train_data[last_motif] != 0)
        ]
        test_data = test_data[
            (test_data[last_motif] != 14) & (test_data[last_motif] != 0)
        ]

    # Get the labels
    train_labels = np.array(train_data[args["label_name"]])
    test_labels = np.array(test_data[args["label_name"]])

    # For the classification task use the threshold to binarize labels
    train_labels[train_labels > args["label_binarization_threshold"]] = 1
    train_labels[train_labels < 1] = args["min_label_value"]
    test_labels[test_labels > args["label_binarization_threshold"]] = 1
    test_labels[test_labels < 1] = args["min_label_value"]

    # Reduce data to just the motifs of interest
    train_data = train_data[args["motifs_to_use"]]
    test_data = test_data[args["motifs_to_use"]]

    # Get the class and motif counts
    min_class = np.min(np.unique(np.concatenate([train_data, test_data])))
    max_class = np.max(np.unique(np.concatenate([train_data, test_data])))

    num_class = max_class - min_class + 1
    num_motifs = len(args["motifs_to_use"])
    print(str(max_class) + ":" + str(min_class) + ":" + str(num_class))

    train_data = train_data - min_class
    test_data = test_data - min_class

    return (
        train_data,
        test_data,
        train_labels,
        test_labels,
        num_class,
        num_motifs,
    )

def data_encoder(args, train_data, test_data, num_class, num_motifs):
    """
    Use one-hot or binary encoding for classical data representation.
    """
    if args["encoder"] == "one-hot":
        # Transform to one-hot encoding
        train_data = np.eye(num_class)[train_data]
        test_data = np.eye(num_class)[test_data]

        train_data = train_data.reshape(
            train_data.shape[0], train_data.shape[1] * train_data.shape[2]
        )
        test_data = test_data.reshape(
            test_data.shape[0], test_data.shape[1] * test_data.shape[2]
        )

    elif args["encoder"] == "binary":
        # Transform to binary encoding
        encoder = ce.BinaryEncoder()

        base_array = np.unique(np.concatenate([train_data, test_data]))
        base = pd.DataFrame(base_array).astype("category")
        base.columns = ["motif"]
        for motif_name in args["motifs_to_use"][1:]:
            base[motif_name] = base.loc[:, "motif"]
        encoder.fit(base)

        train_data = encoder.transform(train_data.astype("category"))
        test_data = encoder.transform(test_data.astype("category"))

        train_data = np.reshape(
            train_data.values, (train_data.shape[0], num_motifs, -1)
        )
        test_data = np.reshape(
            test_data.values, (test_data.shape[0], num_motifs, -1)
        )

        train_data = train_data.reshape(
            train_data.shape[0], train_data.shape[1] * train_data.shape[2]
        )
        test_data = test_data.reshape(
            test_data.shape[0], test_data.shape[1] * test_data.shape[2]
        )

    else:
        raise ValueError("Invalid encoding type.")

    return train_data, test_data
다음 셀을 실행하면 이 튜토리얼을 실행할 수 있습니다. 이 셀은 필요한 폴더 구조를 자동으로 생성하고 훈련 파일과 테스트 파일을 환경에 직접 다운로드합니다. 이미 로컬에 이러한 파일이 있는 경우, 버전 일관성을 보장하기 위해 안전하게 덮어씁니다.
## Download dataset

# Create data directory if it doesn't exist
!mkdir -p data_tutorial/pqk

# Download the training and test sets from the official Qiskit documentation repo
!wget -q --show-progress -O data_tutorial/pqk/train_data.csv \
  https://raw.githubusercontent.com/Qiskit/documentation/main/datasets/tutorials/pqk/train_data.csv

!wget -q --show-progress -O data_tutorial/pqk/test_data.csv \
  https://raw.githubusercontent.com/Qiskit/documentation/main/datasets/tutorials/pqk/test_data.csv

!wget -q --show-progress -O data_tutorial/pqk/projections_train.csv \
  https://raw.githubusercontent.com/Qiskit/documentation/main/datasets/tutorials/pqk/projections_train.csv

!wget -q --show-progress -O data_tutorial/pqk/projections_test.csv \
  https://raw.githubusercontent.com/Qiskit/documentation/main/datasets/tutorials/pqk/projections_test.csv

# Check the files have been downloaded
!echo "Dataset files downloaded:"
!ls -lh data_tutorial/pqk/*.csv
args = {
    "file_train_data": "train_data.csv",
    "file_test_data": "test_data.csv",
    "motifs_to_use": ["motif", "motif.1", "motif.2", "motif.3"],
    "label_name": "Nalm 6 Cytotoxicity",
    "label_binarization_threshold": 0.62,
    "filter_for_spacer_motif_third_position": False,
    "allow_spacer_motif_last_position": True,
    "min_label_value": -1,
    "encoder": "one-hot",
}
dir_root = "./"

# Preprocess data
train_data, test_data, train_labels, test_labels, num_class, num_motifs = (
    preprocess_data(dir_root=dir_root, args=args)
)

# Encode the data
train_data, test_data = data_encoder(
    args, train_data, test_data, num_class, num_motifs
)
14:0:15
또한 스케일링을 위해 데이터셋의 을 로 변환합니다.
# Change 1 to pi/2
angle = np.pi / 2

tmp = pd.DataFrame(train_data).astype("float64")
tmp[tmp == 1] = angle
train_data = tmp.values

tmp = pd.DataFrame(test_data).astype("float64")
tmp[tmp == 1] = angle
test_data = tmp.values
훈련 및 테스트 데이터셋의 크기와 형태를 확인합니다.
print(train_data.shape, train_labels.shape)
print(test_data.shape, test_labels.shape)
(172, 60) (172,)
(74, 60) (74,)
Step 2: 양자 하드웨어 실행을 위한 문제 최적화
양자 Circuit
이제 고전적 데이터셋을 더 높은 차원의 특성 공간에 임베딩하는 특성 맵을 구성합니다. 이 임베딩에는 Qiskit의 ZZFeatureMap을 사용합니다.
feature_dimension = train_data.shape[1]
reps = 24
insert_barriers = True
entanglement = "pairwise"

# ZZFeatureMap with linear entanglement and a repetition of 2
embed = ZZFeatureMap(
    feature_dimension=feature_dimension,
    reps=reps,
    entanglement=entanglement,
    insert_barriers=insert_barriers,
    name="ZZFeatureMap",
)
embed.decompose().draw(output="mpl", style="iqp", fold=-1)

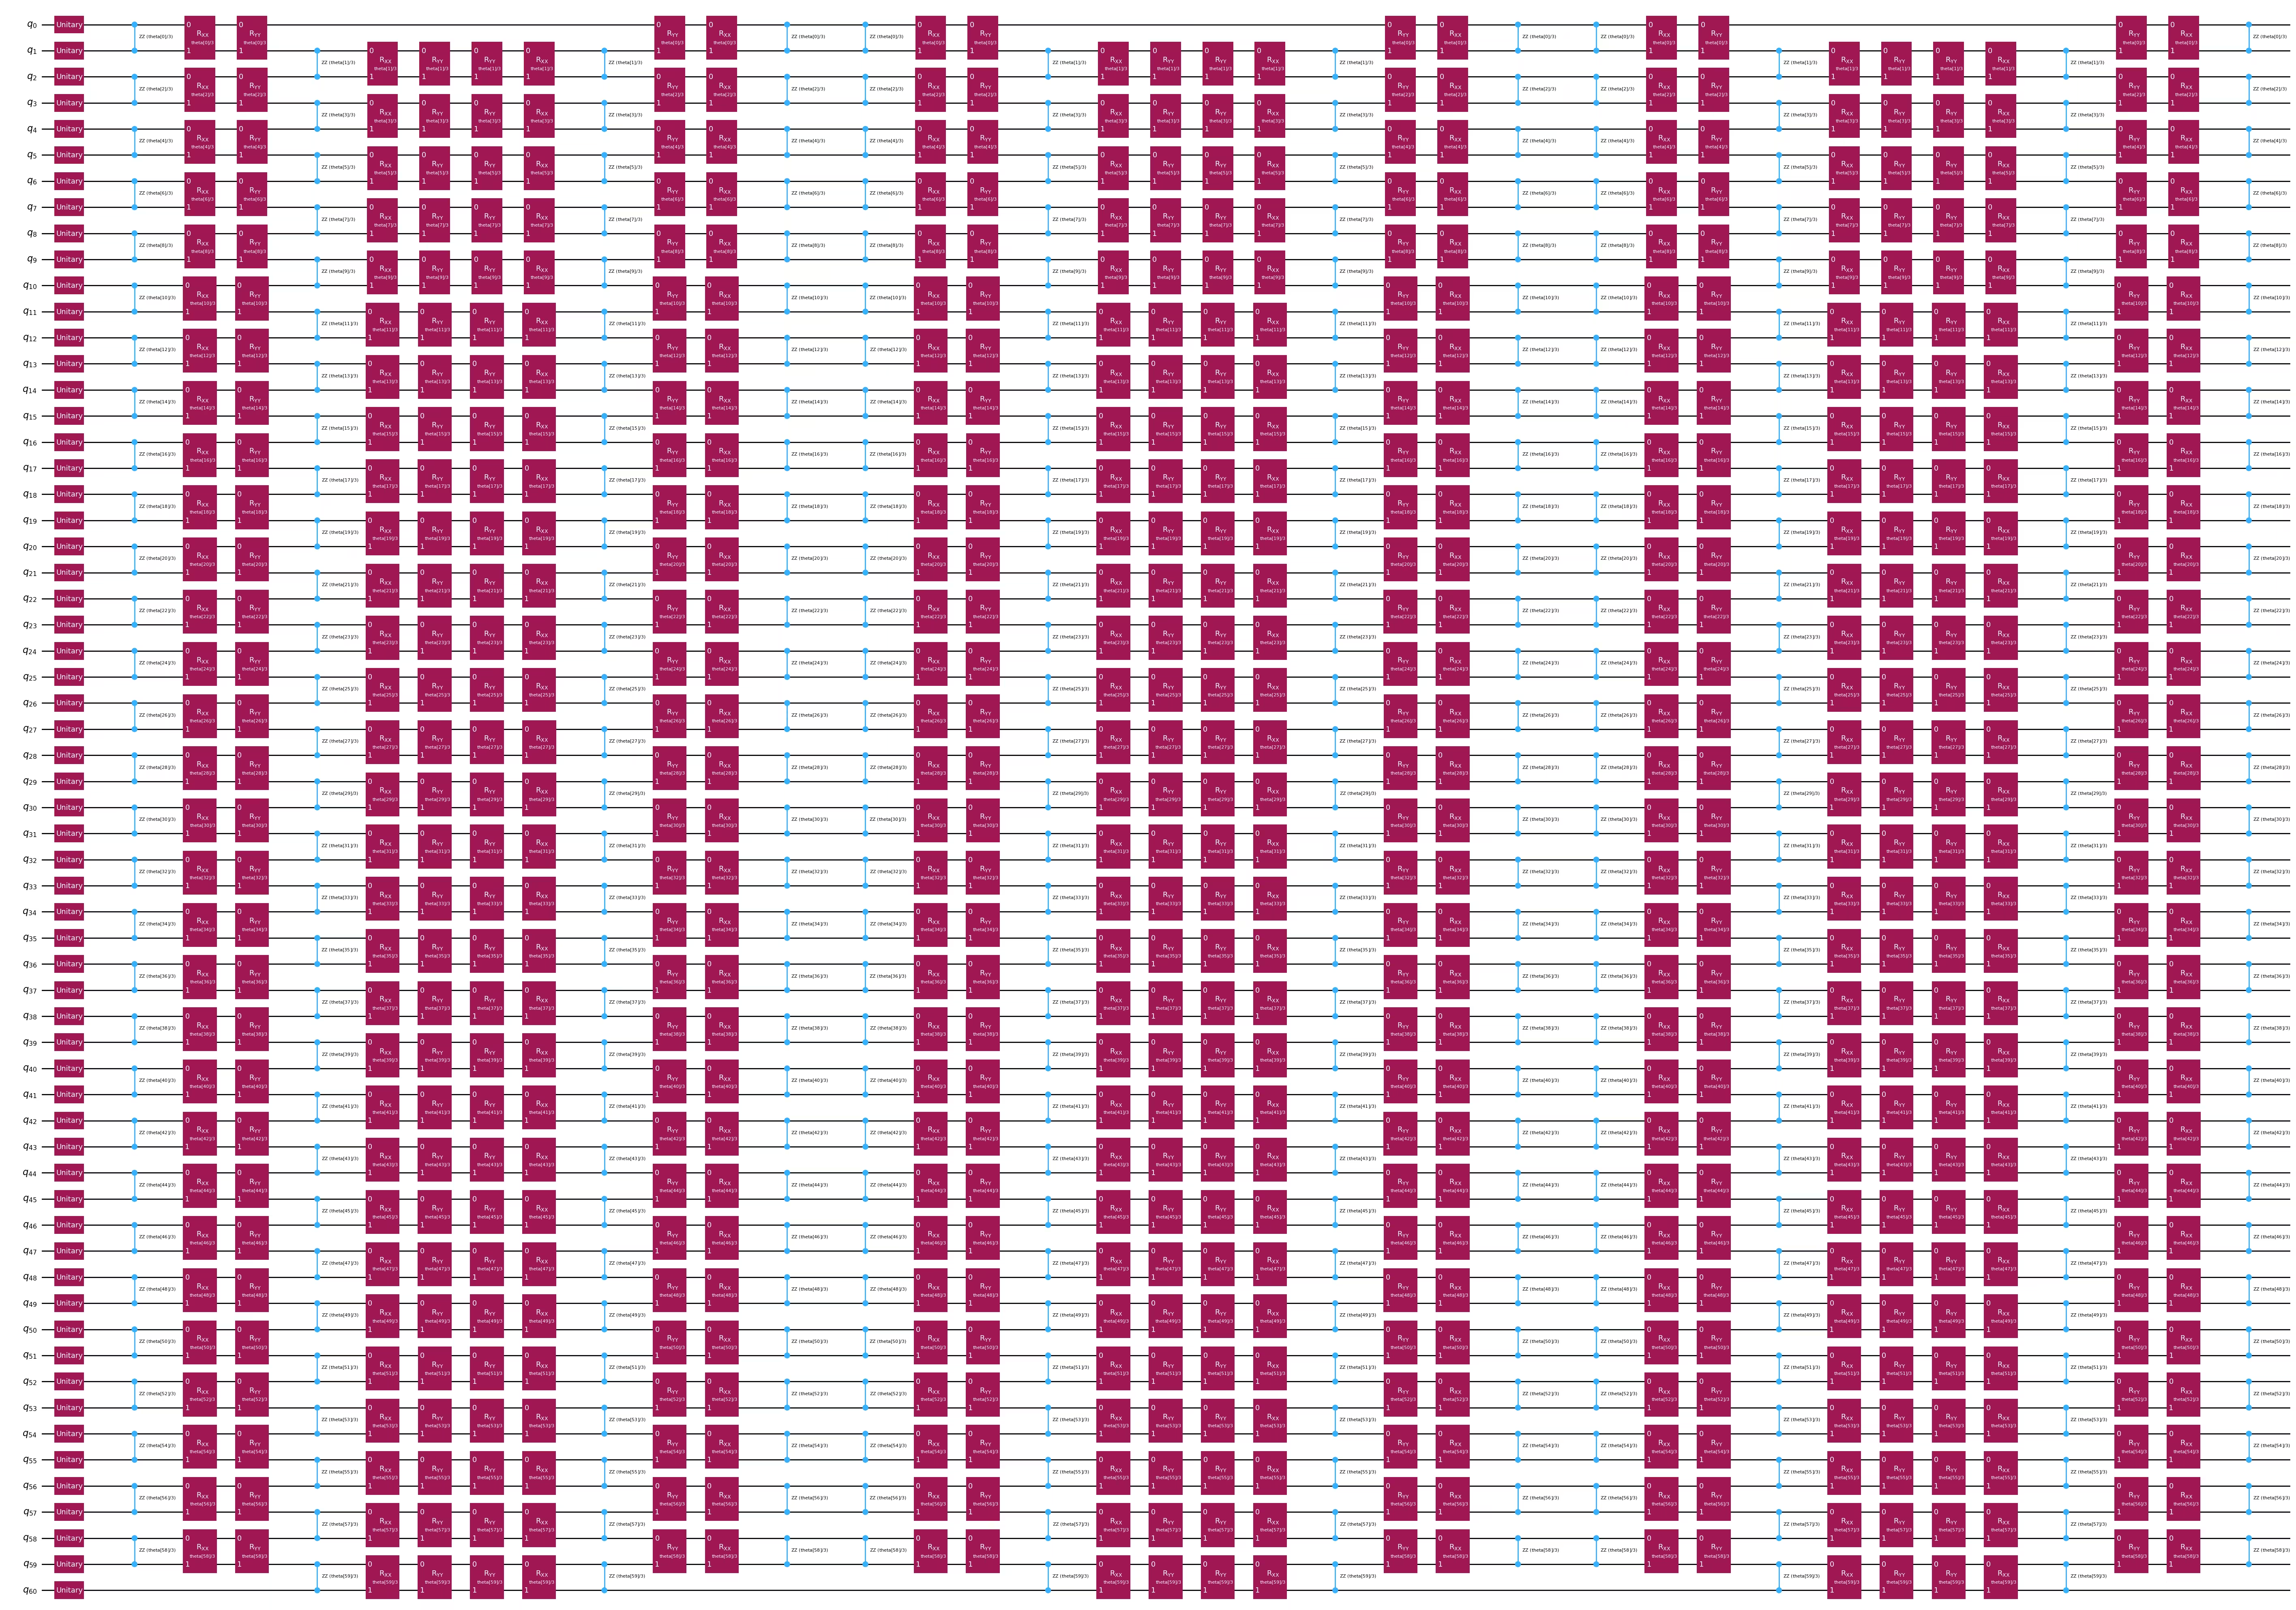
또 다른 양자 임베딩 옵션으로 1D-하이젠베르크 해밀토니안 발전 ansatz가 있습니다. ZZFeatureMap을 계속 사용하고 싶다면 이 섹션을 건너뛰어도 됩니다.
feature_dimension = train_data.shape[1]
num_qubits = feature_dimension + 1
embed2 = QuantumCircuit(num_qubits)
num_trotter_steps = 6
pv_length = feature_dimension * num_trotter_steps
pv = ParameterVector("theta", pv_length)

# Add Haar random single qubit unitary to each qubit as initial state
np.random.seed(42)
seeds_unitary = np.random.randint(0, 100, num_qubits)
for i in range(num_qubits):
    rand_gate = UnitaryGate(random_unitary(2, seed=seeds_unitary[i]))
    embed2.append(rand_gate, [i])

def trotter_circ(feature_dimension, num_trotter_steps):
    num_qubits = feature_dimension + 1
    circ = QuantumCircuit(num_qubits)
    # Even
    for i in range(0, feature_dimension, 2):
        circ.rzz(2 * pv[i] / num_trotter_steps, i, i + 1)
    for i in range(0, feature_dimension, 2):
        circ.rxx(2 * pv[i] / num_trotter_steps, i, i + 1)
    for i in range(0, feature_dimension, 2):
        circ.ryy(2 * pv[i] / num_trotter_steps, i, i + 1)
    # Odd
    for i in range(1, feature_dimension, 2):
        circ.rzz(2 * pv[i] / num_trotter_steps, i, i + 1)
    for i in range(1, feature_dimension, 2):
        circ.rxx(2 * pv[i] / num_trotter_steps, i, i + 1)
    for i in range(1, feature_dimension, 2):
        circ.ryy(2 * pv[i] / num_trotter_steps, i, i + 1)
    return circ

# Hamiltonian evolution ansatz
for step in range(num_trotter_steps):
    circ = trotter_circ(feature_dimension, num_trotter_steps)
    if step % 2 == 0:
        embed2 = embed2.compose(circ)
    else:
        reverse_circ = circ.reverse_ops()
        embed2 = embed2.compose(reverse_circ)

embed2.draw(output="mpl", style="iqp", fold=-1)
Step 3: Qiskit 프리미티브를 사용한 실행
1-RDM 측정
이 단계에서는 양자 특성 맵의 투영 측정을 통해 모든 단일 qubit 축약 밀도 행렬(1-RDM)을 구하며, 이후 고전적인 지수 커널 함수에 입력됩니다.
모든 데이터에 대해 실행하기 전에, 데이터셋의 단일 데이터 포인트로 1-RDM을 계산하는 방법을 살펴봅니다. 1-RDM은 모든 Qubit에 대한 파울리 X, Y, Z 연산자의 단일 qubit 측정 모음입니다. 단일 qubit RDM은 다음과 같이 완전히 표현될 수 있기 때문입니다:
먼저 사용할 Backend를 선택합니다.
service = QiskitRuntimeService()
backend = service.least_busy(
    operational=True, simulator=False, min_num_qubits=133
)
target = backend.target
그런 다음 양자 Circuit을 실행하고 투영값을 측정합니다. Zero Noise Extrapolation(ZNE)을 포함한 오류 완화 기능을 활성화합니다.
# Let's select the ZZFeatureMap embedding for this example
qc = embed
num_qubits = feature_dimension

# Identity operator on all qubits
id = "I" * num_qubits

# Let's select the first training datapoint as an example
parameters = train_data[0]

# Bind parameter to the circuit and simplify it
qc_bound = qc.assign_parameters(parameters)
transpiler = generate_preset_pass_manager(
    optimization_level=3, basis_gates=["u3", "cz"]
)
transpiled_circuit = transpiler.run(qc_bound)

# Transpile for hardware
transpiler = generate_preset_pass_manager(optimization_level=3, target=target)
transpiled_circuit = transpiler.run(transpiled_circuit)

# We group all commuting observables
# These groups are the Pauli X, Y and Z operators on individual qubits
observables_x = [
    SparsePauliOp(id[:i] + "X" + id[(i + 1) :]).apply_layout(
        transpiled_circuit.layout
    )
    for i in range(num_qubits)
]
observables_y = [
    SparsePauliOp(id[:i] + "Y" + id[(i + 1) :]).apply_layout(
        transpiled_circuit.layout
    )
    for i in range(num_qubits)
]
observables_z = [
    SparsePauliOp(id[:i] + "Z" + id[(i + 1) :]).apply_layout(
        transpiled_circuit.layout
    )
    for i in range(num_qubits)
]

# We define the primitive unified blocs (PUBs) consisting of the embedding circuit,
# set of observables and the circuit parameters
pub_x = (transpiled_circuit, observables_x)
pub_y = (transpiled_circuit, observables_y)
pub_z = (transpiled_circuit, observables_z)

# Experiment options for error mitigation
num_randomizations = 300
shots_per_randomization = 100
noise_factors = [1, 3, 5]

experimental_opts = {}
experimental_opts["resilience"] = {
    "measure_mitigation": True,
    "zne_mitigation": True,
    "zne": {
        "noise_factors": noise_factors,
        "amplifier": "gate_folding",
        "extrapolated_noise_factors": [0] + noise_factors,
    },
}
experimental_opts["twirling"] = {
    "num_randomizations": num_randomizations,
    "shots_per_randomization": shots_per_randomization,
    "strategy": "active-accum",
}

# We define and run the estimator to obtain <X>, <Y> and <Z> on all qubits
estimator = Estimator(mode=backend, options=experimental_opts)

job = estimator.run([pub_x, pub_y, pub_z])
다음으로 결과를 가져옵니다.
job_result_x = job.result()[0].data.evs
job_result_y = job.result()[1].data.evs
job_result_z = job.result()[2].data.evs
print(job_result_x)
print(job_result_y)
print(job_result_z)
[ 3.67865951e-03  1.01158571e-02 -3.95790878e-02  6.33984326e-03
  1.86035759e-02 -2.91533268e-02 -1.06374793e-01  4.48873518e-18
  4.70201764e-02  3.53997968e-02  2.53130819e-02  3.23903401e-02
  6.06327843e-03  1.16313667e-02 -1.12387504e-02 -3.18457725e-02
 -4.16445718e-04 -1.45609602e-03 -4.21737114e-01  2.83705669e-02
  6.91332890e-03 -7.45363001e-02 -1.20139326e-02 -8.85566135e-02
 -3.22648394e-02 -3.24228074e-02  6.20431299e-04  3.04225434e-03
  5.72795792e-03  1.11288428e-02  1.50395861e-01  9.18380197e-02
  1.02553163e-01  2.98312847e-02 -3.30298912e-01 -1.13979648e-01
  4.49159340e-03  8.63861493e-02  3.05666566e-02  2.21463145e-04
  1.45946735e-02  8.54537275e-03 -8.09805979e-02 -2.92608104e-02
 -3.91243644e-02 -3.96632760e-02 -1.41187613e-01 -1.07363243e-01
  1.81089440e-02  2.70778895e-02  1.45139414e-02  2.99480458e-02
  4.99137134e-02  7.08789852e-02  4.30565759e-02  8.71287156e-02
  1.04334798e-01  7.72191962e-02  7.10059720e-02  1.04650403e-01]
[-7.31765102e-05  7.42669174e-03  9.82277344e-03  5.92638249e-02
  4.24120486e-02 -9.06473416e-03  4.55057675e-03  8.43494094e-03
  6.92097339e-02 -6.82234424e-02  6.13509008e-02  3.94200491e-02
 -1.24037979e-02  1.01976642e-01  7.90538600e-03 -7.19726160e-02
 -1.19501703e-16 -1.03796614e-02  7.37382463e-02  1.97238568e-01
 -3.59250635e-02 -2.67554009e-02  3.55010633e-02  7.68877990e-02
  6.50677589e-05 -6.59298767e-03 -1.23719487e-02 -6.41938151e-02
  1.95603072e-02 -2.48448551e-02  5.17784810e-02 -5.93767100e-02
  3.11897681e-02 -3.91959720e-18 -4.47769148e-03  1.39202197e-01
 -6.56387523e-02 -5.85665483e-02  9.52905894e-03 -8.61460731e-02
  3.91790656e-02 -1.27544375e-01  1.63712244e-01  3.36816934e-04
  2.26230028e-02 -2.45023393e-05  4.95635588e-03  1.44779564e-01
  3.71625177e-02  3.65675948e-03  2.83694017e-02 -7.10500602e-02
 -1.15467702e-01  6.21712129e-03 -4.80958959e-02  2.21021066e-02
  7.99062499e-02 -1.87164076e-02 -3.67100369e-02 -2.38923731e-02]
[ 6.85871605e-01  5.07725024e-01  8.71024642e-03  3.34823455e-02
  4.58684961e-02  9.44384189e-17 -4.46829296e-02 -2.91296778e-02
  4.15466461e-02  2.89628330e-02  1.88624017e-03  5.37110446e-02
  2.59579053e-03  1.39327071e-02 -2.90781778e-02  5.07209866e-03
  5.83403000e-02  2.60764440e-02  4.45999706e-17 -6.66701417e-03
  3.03215873e-01  2.26172533e-02  2.43105960e-02  4.98861041e-18
 -2.45530791e-02  6.26940708e-02  1.21058073e-02  2.76675948e-04
  2.63980996e-02  2.58302364e-02  7.47856723e-02  8.42728943e-02
  5.70989097e-02  6.92955086e-02 -5.68313712e-03  1.32199452e-01
  8.90511238e-02 -3.45204621e-02 -1.05445836e-01  6.03864150e-03
  2.16291384e-02  8.22303162e-03  1.00856715e-02  6.28973151e-02
  6.26727169e-02  6.15399206e-02  9.67320897e-02  1.03045269e-16
  1.79688783e-01 -1.59960520e-02 -1.15422952e-02  9.60200470e-03
  6.58396672e-02  7.78329830e-03  6.53226955e-02  2.45778685e-03
  4.36694753e-03  5.75098762e-03 -2.48896201e-02  8.33740755e-05]
Circuit 크기와 2-Qubit Gate 깊이를 출력합니다.
print(f"qubits: {qc.num_qubits}")
print(
    f"2q-depth: {transpiled_circuit.depth(lambda x: x.operation.num_qubits==2)}"
)
print(
    f"2q-size: {transpiled_circuit.size(lambda x: x.operation.num_qubits==2)}"
)
print(f"Operator counts: {transpiled_circuit.count_ops()}")
transpiled_circuit.draw("mpl", fold=-1, style="clifford", idle_wires=False)
qubits: 60
2q-depth: 64
2q-size: 1888
Operator counts: OrderedDict({'rz': 6016, 'sx': 4576, 'cz': 1888, 'x': 896, 'barrier': 31})

이제 전체 훈련 데이터셋을 반복하여 모든 1-RDM을 구할 수 있습니다.
또한 실제 양자 하드웨어에서 실행한 실험 결과도 제공합니다. 아래 플래그를 True로 설정하여 직접 훈련을 실행하거나, 제공된 투영 결과를 사용할 수 있습니다.
# Set this to True if you want to run the training on hardware
run_experiment = False
# Identity operator on all qubits
id = "I" * num_qubits

# projections_train[i][j][k] will be the expectation value of the j-th
# Pauli operator (0: X, 1: Y, 2: Z) of datapoint i on qubit k
projections_train = []
jobs_train = []

# Experiment options for error mitigation
num_randomizations = 300
shots_per_randomization = 100
noise_factors = [1, 3, 5]

experimental_opts = {}
experimental_opts["resilience"] = {
    "measure_mitigation": True,
    "zne_mitigation": True,
    "zne": {
        "noise_factors": noise_factors,
        "amplifier": "gate_folding",
        "return_all_extrapolated": True,
        "return_unextrapolated": True,
        "extrapolated_noise_factors": [0] + noise_factors,
    },
}
experimental_opts["twirling"] = {
    "num_randomizations": num_randomizations,
    "shots_per_randomization": shots_per_randomization,
    "strategy": "active-accum",
}
options = EstimatorOptions(experimental=experimental_opts)

if run_experiment:
    with Batch(backend=backend):
        for i in tqdm.tqdm(
            range(len(train_data)), desc="Training data progress"
        ):
            # Get training sample
            parameters = train_data[i]

            # Bind parameter to the circuit and simplify it
            qc_bound = qc.assign_parameters(parameters)
            transpiler = generate_preset_pass_manager(
                optimization_level=3, basis_gates=["u3", "cz"]
            )
            transpiled_circuit = transpiler.run(qc_bound)

            # Transpile for hardware
            transpiler = generate_preset_pass_manager(
                optimization_level=3, target=target
            )
            transpiled_circuit = transpiler.run(transpiled_circuit)

            # We group all commuting observables
            # These groups are the Pauli X, Y and Z operators on individual qubits
            observables_x = [
                SparsePauliOp(id[:i] + "X" + id[(i + 1) :]).apply_layout(
                    transpiled_circuit.layout
                )
                for i in range(num_qubits)
            ]
            observables_y = [
                SparsePauliOp(id[:i] + "Y" + id[(i + 1) :]).apply_layout(
                    transpiled_circuit.layout
                )
                for i in range(num_qubits)
            ]
            observables_z = [
                SparsePauliOp(id[:i] + "Z" + id[(i + 1) :]).apply_layout(
                    transpiled_circuit.layout
                )
                for i in range(num_qubits)
            ]

            # We define the primitive unified blocs (PUBs) consisting
            # of the embedding circuit,
            # set of observables and the circuit parameters
            pub_x = (transpiled_circuit, observables_x)
            pub_y = (transpiled_circuit, observables_y)
            pub_z = (transpiled_circuit, observables_z)

            # We define and run the estimator to obtain <X>, <Y> and <Z>
            # on all qubits
            estimator = Estimator(options=options)

            job = estimator.run([pub_x, pub_y, pub_z])
            jobs_train.append(job)
Training data progress: 100%|██████████| 172/172 [13:03<00:00, 4.55s/it]
작업이 완료되면 결과를 가져올 수 있습니다.
if run_experiment:
    for i in tqdm.tqdm(
        range(len(train_data)), desc="Retrieving training data results"
    ):
        # Completed job
        job = jobs_train[i]

        # Job results
        job_result_x = job.result()[0].data.evs
        job_result_y = job.result()[1].data.evs
        job_result_z = job.result()[2].data.evs

        # Record <X>, <Y> and <Z> on all qubits for the current datapoint
        projections_train.append([job_result_x, job_result_y, job_result_z])
테스트 세트에 대해서도 동일하게 반복합니다.
# Identity operator on all qubits
id = "I" * num_qubits

# projections_test[i][j][k] will be the expectation value of the
# j-th Pauli operator (0: X, 1: Y, 2: Z) of datapoint i on qubit k
projections_test = []
jobs_test = []

# Experiment options for error mitigation
num_randomizations = 300
shots_per_randomization = 100
noise_factors = [1, 3, 5]

experimental_opts = {}
experimental_opts["resilience"] = {
    "measure_mitigation": True,
    "zne_mitigation": True,
    "zne": {
        "noise_factors": noise_factors,
        "amplifier": "gate_folding",
        "return_all_extrapolated": True,
        "return_unextrapolated": True,
        "extrapolated_noise_factors": [0] + noise_factors,
    },
}
experimental_opts["twirling"] = {
    "num_randomizations": num_randomizations,
    "shots_per_randomization": shots_per_randomization,
    "strategy": "active-accum",
}
options = EstimatorOptions(experimental=experimental_opts)

if run_experiment:
    with Batch(backend=backend):
        for i in tqdm.tqdm(range(len(test_data)), desc="Test data progress"):
            # Get test sample
            parameters = test_data[i]

            # Bind parameter to the circuit and simplify it
            qc_bound = qc.assign_parameters(parameters)
            transpiler = generate_preset_pass_manager(
                optimization_level=3, basis_gates=["u3", "cz"]
            )
            transpiled_circuit = transpiler.run(qc_bound)

            # Transpile for hardware
            transpiler = generate_preset_pass_manager(
                optimization_level=3, target=target
            )
            transpiled_circuit = transpiler.run(transpiled_circuit)

            # We group all commuting observables
            # These groups are the Pauli X, Y and Z operators on individual qubits
            observables_x = [
                SparsePauliOp(id[:i] + "X" + id[(i + 1) :]).apply_layout(
                    transpiled_circuit.layout
                )
                for i in range(num_qubits)
            ]
            observables_y = [
                SparsePauliOp(id[:i] + "Y" + id[(i + 1) :]).apply_layout(
                    transpiled_circuit.layout
                )
                for i in range(num_qubits)
            ]
            observables_z = [
                SparsePauliOp(id[:i] + "Z" + id[(i + 1) :]).apply_layout(
                    transpiled_circuit.layout
                )
                for i in range(num_qubits)
            ]

            # We define the primitive unified blocs (PUBs) consisting of
            # the embedding circuit,
            # set of observables and the circuit parameters
            pub_x = (transpiled_circuit, observables_x)
            pub_y = (transpiled_circuit, observables_y)
            pub_z = (transpiled_circuit, observables_z)

            # We define and run the estimator to obtain <X>, <Y> and <Z> on all qubits
            estimator = Estimator(options=options)

            job = estimator.run([pub_x, pub_y, pub_z])
            jobs_test.append(job)
Test data progress: 100%|██████████| 74/74 [00:13<00:00, 5.56it/s]
이전과 동일하게 결과를 가져올 수 있습니다.
if run_experiment:
    for i in tqdm.tqdm(
        range(len(test_data)), desc="Retrieving test data results"
    ):
        # Completed job
        job = jobs_test[i]

        # Job results
        job_result_x = job.result()[0].data.evs
        job_result_y = job.result()[1].data.evs
        job_result_z = job.result()[2].data.evs

        # Record <X>, <Y> and <Z> on all qubits for the current datapoint
        projections_test.append([job_result_x, job_result_y, job_result_z])
Step 4: 결과를 원하는 고전적 형식으로 후처리하여 반환하기
투영 양자 커널 정의
투영 양자 커널은 다음과 같은 커널 함수로 정의됩니다:
위 수식에서 은 조정 가능한 하이퍼파라미터입니다. 는 커널 행렬 의 원소입니다.
1-RDM의 정의를 이용하면, 커널 함수 내의 각 항을 로 평가할 수 있음을 알 수 있습니다. 여기서 이며, 이 기댓값들이 바로 위에서 측정한 값입니다.
scikit-learn을 사용하면 커널을 훨씬 더 쉽게 계산할 수 있습니다. 이는 방사 기저 함수('rbf') 커널: 를 바로 활용할 수 있기 때문입니다. 우선, 새롭게 투영된 훈련 및 테스트 데이터셋을 2차원 배열로 변환해야 합니다.
전체 데이터셋을 처리하는 데는 QPU에서 약 80분 정도 소요될 수 있습니다. 나머지 튜토리얼을 쉽게 실행할 수 있도록, 이전에 수행한 실험에서 얻은 투영값도 함께 제공합니다(이 값들은 Download dataset 코드 블록에서 다운로드한 파일에 포함되어 있습니다). 직접 훈련을 수행했다면, 자신의 결과물로 튜토리얼을 계속 진행할 수 있습니다.
if run_experiment:
    projections_train = np.array(projections_train).reshape(
        len(projections_train), -1
    )
    projections_test = np.array(projections_test).reshape(
        len(projections_test), -1
    )
else:
    projections_train = np.loadtxt("projections_train.txt")
    projections_test = np.loadtxt("projections_test.txt")
서포트 벡터 머신(SVM)
이제 사전 계산된 커널을 이용하여 고전적인 SVM을 실행하고, 테스트 세트와 훈련 세트 간의 커널을 예측에 활용할 수 있습니다.
# Range of 'C' and 'gamma' values as SVC hyperparameters
C_range = [0.001, 0.005, 0.007]
C_range.extend([x * 0.01 for x in range(1, 11)])
C_range.extend([x * 0.25 for x in range(1, 60)])
C_range.extend(
    [
        20,
        50,
        100,
        200,
        500,
        700,
        1000,
        1100,
        1200,
        1300,
        1400,
        1500,
        1700,
        2000,
    ]
)

gamma_range = ["auto", "scale", 0.001, 0.005, 0.007]
gamma_range.extend([x * 0.01 for x in range(1, 11)])
gamma_range.extend([x * 0.25 for x in range(1, 60)])
gamma_range.extend([20, 50, 100])

param_grid = dict(C=C_range, gamma=gamma_range)

# Support vector classifier
svc = SVC(kernel="rbf")

# Define the cross validation
cv = StratifiedKFold(n_splits=10)

# Grid search for hyperparameter tuning (q: quantum)
grid_search_q = GridSearchCV(
    svc, param_grid, cv=cv, verbose=1, n_jobs=-1, scoring="f1_weighted"
)
grid_search_q.fit(projections_train, train_labels)

# Best model with best parameters
best_svc_q = grid_search_q.best_estimator_
print(
    f"The best parameters are {grid_search_q.best_params_} with a score of {grid_search_q.best_score_:.4f}"
)

# Test accuracy
accuracy_q = best_svc_q.score(projections_test, test_labels)
print(f"Test accuracy with best model: {accuracy_q:.4f}")
Fitting 10 folds for each of 6622 candidates, totalling 66220 fits
The best parameters are {'C': 8.5, 'gamma': 0.01} with a score of 0.6980
Test accuracy with best model: 0.8108
고전적 벤치마킹
양자 투영 없이 방사 기저 함수를 커널로 사용하는 고전적인 SVM을 실행할 수 있습니다. 이 결과가 우리의 고전적 벤치마크가 됩니다.
# Support vector classifier
svc = SVC(kernel="rbf")

# Grid search for hyperparameter tuning (c: classical)
grid_search_c = GridSearchCV(
    svc, param_grid, cv=cv, verbose=1, n_jobs=-1, scoring="f1_weighted"
)
grid_search_c.fit(train_data, train_labels)

# Best model with best parameters
best_svc_c = grid_search_c.best_estimator_
print(
    f"The best parameters are {grid_search_c.best_params_} with a score of {grid_search_c.best_score_:.4f}"
)

# Test accuracy
accuracy_c = best_svc_c.score(test_data, test_labels)
print(f"Test accuracy with best model: {accuracy_c:.4f}")
Fitting 10 folds for each of 6622 candidates, totalling 66220 fits
The best parameters are {'C': 10.75, 'gamma': 0.04} with a score of 0.7830
Test accuracy with best model: 0.7432
부록: 학습 작업에서 데이터셋의 잠재적 양자 우위 검증
모든 데이터셋이 PQK 사용으로 인한 잠재적 우위를 제공하는 것은 아닙니다. 특정 데이터셋이 PQK로부터 이점을 얻을 수 있는지 사전 테스트할 수 있는 이론적 한계가 존재합니다. 이를 정량화하기 위해, Power of data in quantum machine learning [2]의 저자들은 고전적 모델 복잡도, 양자 모델 복잡도, 그리고 고전 모델과 양자 모델의 기하학적 분리라는 개념을 정의합니다. PQK에서 잠재적인 양자 우위를 기대하려면, 고전 커널과 양자 투영 커널 사이의 기하학적 분리가 훈련 샘플 수 에 대해 대략 수준이어야 합니다. 이 조건이 충족되면, 다음으로 모델 복잡도를 확인합니다. 고전적 모델 복잡도가 수준인 반면 양자 투영 모델 복잡도가 보다 훨씬 작다면, PQK로부터 잠재적인 우위를 기대할 수 있습니다. 기하학적 분리는 다음과 같이 정의됩니다([2]의 F19):
# Gamma values used in best models above
gamma_c = grid_search_c.best_params_["gamma"]
gamma_q = grid_search_q.best_params_["gamma"]

# Regularization parameter used in the best classical model above
C_c = grid_search_c.best_params_["C"]
l_c = 1 / C_c

# Classical and quantum kernels used above
K_c = rbf_kernel(train_data, train_data, gamma=gamma_c)
K_q = rbf_kernel(projections_train, projections_train, gamma=gamma_q)

# Intermediate matrices in the equation
K_c_sqrt = sqrtm(K_c)
K_q_sqrt = sqrtm(K_q)
K_c_inv = inv(K_c + l_c * np.eye(K_c.shape[0]))
K_multiplication = (
    K_q_sqrt @ K_c_sqrt @ K_c_inv @ K_c_inv @ K_c_sqrt @ K_q_sqrt
)

# Geometric separation
norm = np.linalg.norm(K_multiplication, ord=np.inf)
g_cq = np.sqrt(norm)
print(
    f"Geometric separation between classical and quantum kernels is {g_cq:.4f}"
)

print(np.sqrt(len(train_data)))
Geometric separation between classical and quantum kernels is 1.5440
13.114877048604
모델 복잡도는 다음과 같이 정의됩니다([2]의 M1):
# Model complexity of the classical kernel

# Number of training data
N = len(train_data)

# Predicted labels
pred_labels = best_svc_c.predict(train_data)
pred_matrix = np.outer(pred_labels, pred_labels)

# Intermediate terms
K_c_inv = inv(K_c + l_c * np.eye(K_c.shape[0]))

# First term
first_sum = np.sum((K_c_inv @ K_c_inv) * pred_matrix)
first_term = l_c * np.sqrt(first_sum / N)

# Second term
second_sum = np.sum((K_c_inv @ K_c @ K_c_inv) * pred_matrix)
second_term = np.sqrt(second_sum / N)

# Model complexity
s_c = first_term + second_term
print(f"Classical model complexity is {s_c:.4f}")
Classical model complexity is 1.3578
# Model complexity of the projected quantum kernel

# Number of training data
N = len(projections_train)

# Predicted labels
pred_labels = best_svc_q.predict(projections_train)
pred_matrix = np.outer(pred_labels, pred_labels)

# Regularization parameter used in the best classical model above
C_q = grid_search_q.best_params_["C"]
l_q = 1 / C_q

# Intermediate terms
K_q_inv = inv(K_q + l_q * np.eye(K_q.shape[0]))

# First term
first_sum = np.sum((K_q_inv @ K_q_inv) * pred_matrix)
first_term = l_q * np.sqrt(first_sum / N)

# Second term
second_sum = np.sum((K_q_inv @ K_q @ K_q_inv) * pred_matrix)
second_term = np.sqrt(second_sum / N)

# Model complexity
s_q = first_term + second_term
print(f"Quantum model complexity is {s_q:.4f}")
Quantum model complexity is 1.5806
다음 단계
이 내용이 흥미로우셨다면, 다음 자료도 살펴보시기 바랍니다:
- IBM Quantum Learning의 심화 양자 머신 러닝 과정
- 양자 커널 훈련 튜토리얼
참고문헌
- Utro, Filippo, et al. "Enhanced Prediction of CAR T-Cell Cytotoxicity with Quantum-Kernel Methods." arXiv preprint arXiv:2507.22710 (2025).
- Huang, Hsin-Yuan, et al. "Power of data in quantum machine learning." Nature communications 12.1 (2021): 2631.
- Daniels, Kyle G., et al. "Decoding CAR T cell phenotype using combinatorial signaling motif libraries and machine learning." Science 378.6625 (2022): 1194-1200.